Skeletonized Handles – Drunken Marmot Style (Punched and Drifted)

Inspired by Lin Rhea’s “X-RHEA” knives, this is my take on forging skeletonized handles. The handles are formed by punching a hole, drifting the hole (enlarging the hole by forcing a conical drift(s) through it), further expanding the hole on the horn of the anvil (similar to forging a bottle opener, but quite a bit larger loop/hole) and then collapsing the loop to form the handle. This is a very different process than the X-RHEA handles where the tang is stretched out, folded back on itself and then riveted back to the base to close the loop.

The photos below shows the process progression of forging the handle for a smaller blade (1/4″ x 1″ bar stock), and an intermediate sized handle in progress (for larger handles I’ve been forging the loop to around 3 inch diameter.)

Couple finished examples in CruForgeV, 1095 and 1095/15N20 Damascus, varying the handle thickness/size/weight depending on application:
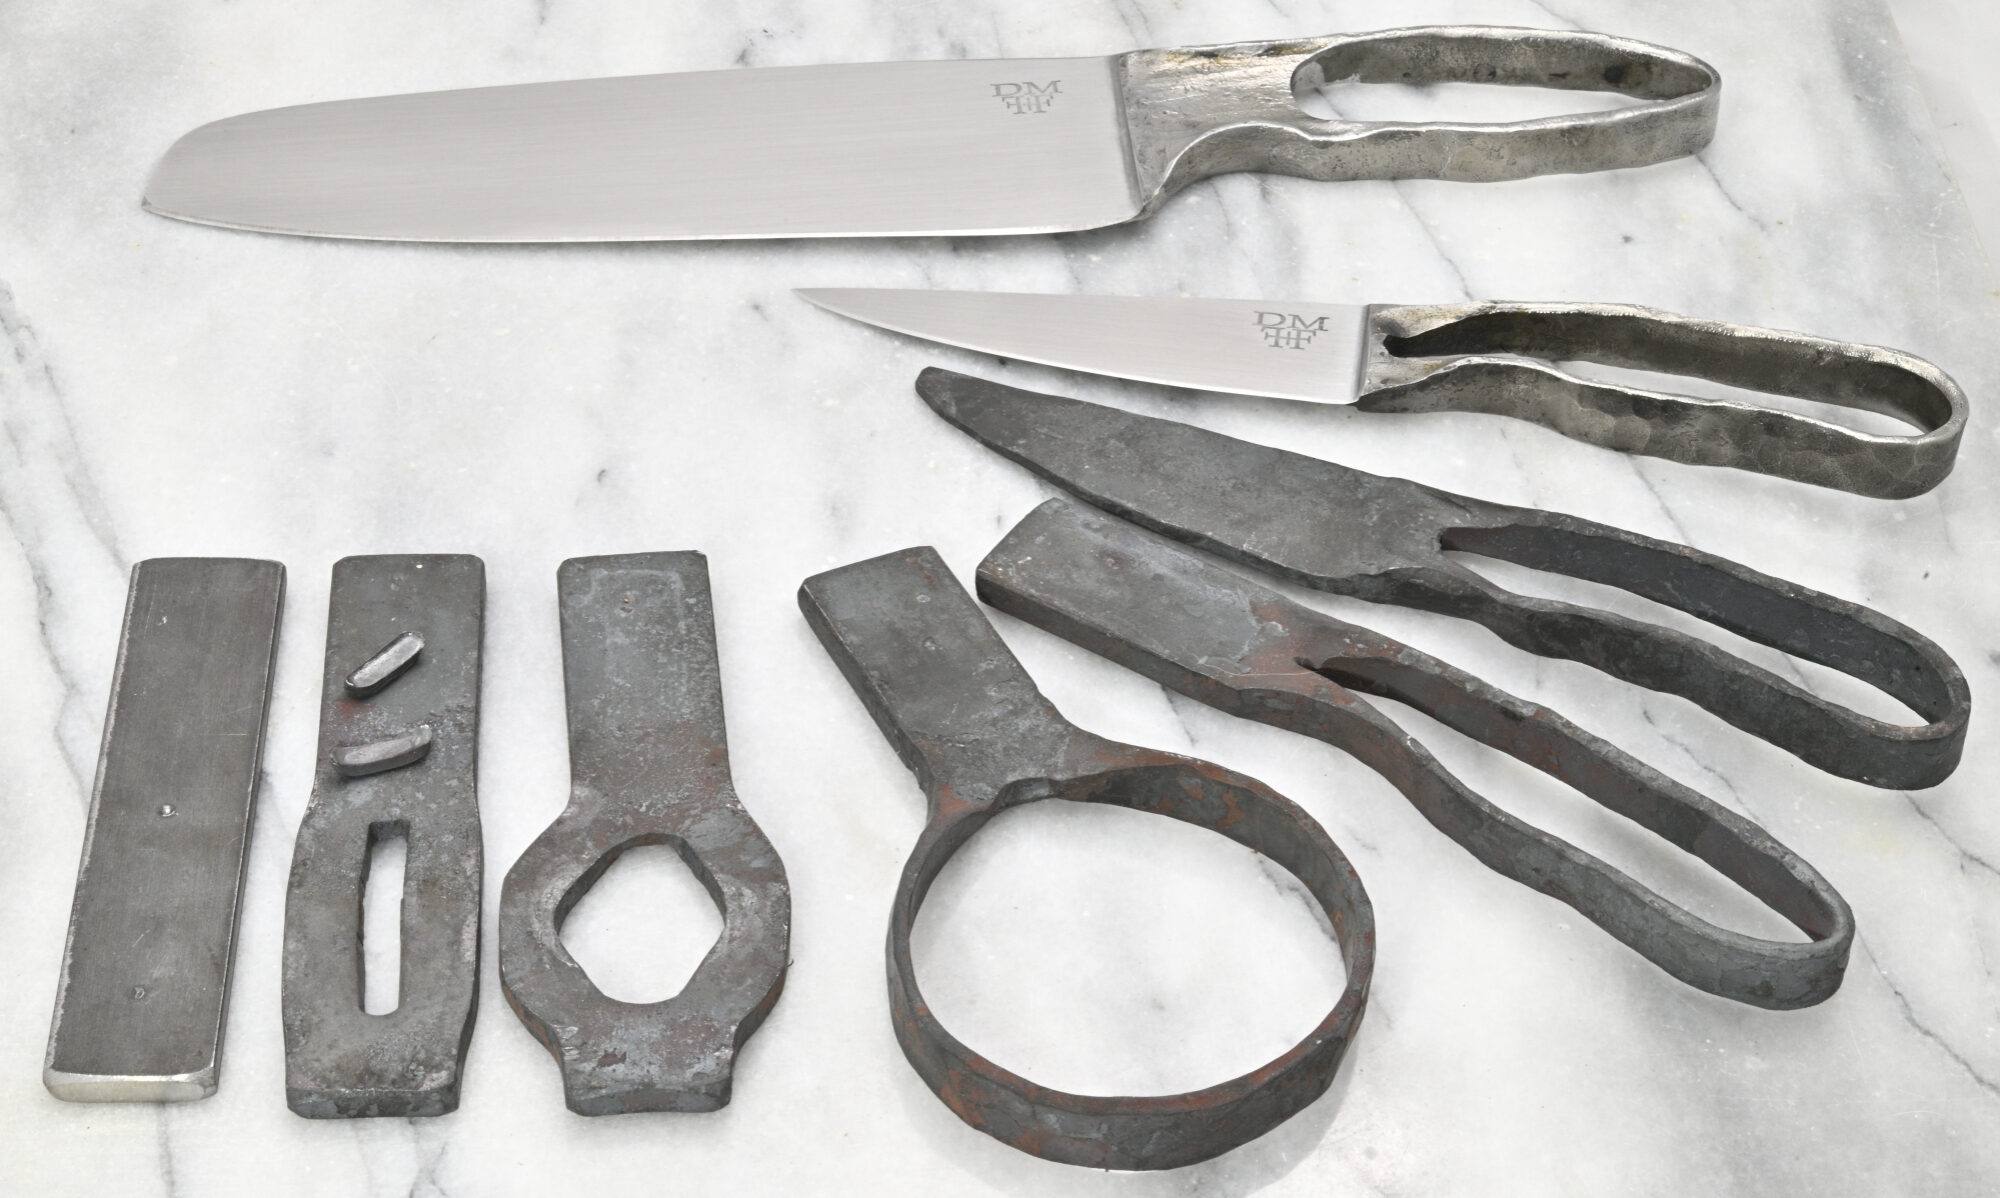
2024 Markets, Art Fairs, etc.

Sunriver Art Fair at Sunriver Resort, Sunriver, Oregon, August 11-12 9-5PM, August 13 9-3PM

Art in the High Desert, Bend, Oregon, Aug 23-25

Blade Show West, Salt Lake City, Utah, October 4-5

Sisters Harvest Faire, Sisters, Oregon, October 12 10-4PM, October 13 10-3PM

Central Oregon Metal Arts Guild Annual Show, Bend, Oregon, Nov 22-24 (2 of these 3 days)

Previous Events:

2023 Markets, Art Fairs, etc.

First Friday at The Ale Apothecary , Bend, Oregon, Dec 1, 4:30-7:30 PM (confirmed)

Bevel Holiday Makers Market at Bevel Brewing, Bend, Oregon, Dec 2, noon-4PM (confirmed)

Cascade Lakes Brewing Holiday Makers Market at Cascade Lakes Brewing (Century Drive location), Bend, Oregon, Dec 9, 1-4PM (confirmed)

Crux Holiday Market at Crux Fermentation Project, Bend, Oregon, December 10, 11-4 PM (confirmed)

Winter Market at Oregon Spirit Distillers, Bend, Oregon, December 16, 1-7PM (confirmed)

Pronghorn/Juniper Preserve Winter Market at Pronghorn/Juniper Preserve, December 17, 11-3PM (confirmed)

Previous Events this year:

Central Oregon Metal Arts Guild 9th Annual Show, Open Space Event Studios, Bend, Oregon, August 4 11-7PM, August 5 10-7PM (confirmed)

Sunriver Art Fair at Sunriver Resort, Sunriver, Oregon, August 11-12 9-5PM, August 13 9-3PM (confirmed)

Spring Vendor Market at Juniper Preserve (formerly Pronghorn), Bend, Oregon, March 19, 11AM-3PM (confirmed)

9th Street Village Makers Market at Bevel Brewing , May 7, May 14, May 21, June 4, and Sept 17, Noon-4PM (confirmed)

Macho Market at Juniper Preserve, June 15, 5-9 PM

National Cherry Festival Arts and Crafts Fair at Downtown Union Street, Traverse City, Michigan, July 2, 9AM-5PM (confirmed)

Cheba Hut Summer Market at Cheba Hut, Bend, Oregon, August 20, noon-5PM (confirmed)

Fall Pop-Up at River’s Place, Bend, Oregon, September 30, 12-5PM (confirmed)

Sisters Harvest Faire, Sisters, Oregon, October 7 10-4PM, October 8 10-3PM (confirmed)

Care and Maintenance of Carbon and Carbon Damascus Steels Part 3: Sharpening

There are plenty of different ways to sharpen simple carbon steels, just about every abrasive will work. Simple carbon steels form primarily iron carbides when hardened, which aren’t as hard as other carbides that make ‘super steels’ a pain to sharpen. Simple carbon steels can be hardened to low 60’s on the Rockwell C scale and will hold an edge extremely well when cutting normal materials (I don’t consider sandpaper to be a normal material, although I do cut it regularly sizing sandpaper for a 9″ disc grinder).

I strongly recommend learning freehand sharpening, it’s simple to learn with good instructions/guidance and a great skill to learn. Once you’ve got the muscle memory down then just about anything harder than the steel will work for sharpening a simple carbon steel blade if you don’t have a sharpening stone with you but want to touch up an edge.

Murray Carter has a great DVD on sharpening that he uploaded to youtube for free viewing – I highly recommend this as a starting point for learning freehand sharpening, practice a few times a week with your least favorite kitchen knife:

For kitchen knives and finer slicing knives this is more/less the method I use, starting with 1k King stones and then moving to 6k King stones to finish. As the King stones need to be saturated, I store them in water on the counter next to the laundry room sink (change the water every 6 month or so to prevent small civilizations from forming in there.) When traveling (camping/roadtrip/backpacking/knife shows) I usually opt for diamond stones or ceramics where I don’t need so much water. They just need to be cleaned frequently with a little water and Barkeeper’s Friend or Comet powder, otherwise the removed steel clogs up the abrasives.

For general use knives I prefer a bit of a convex edge that can take a bit more abuse. To define the edge bevels, I use a rotary platen on my 2×72 belt grinder with 220 grit belt. The rotary platen is belt supported and lets me set the half-angle by rotating the set of wheels and checking the angle with a digital level. This lets me dial in 30, 35 or 40 degree total angle bevels quickly and easily by grinding with the edge facing down and perpendicular to the ground.

Once I build up a burr along the entire length of the edge then I remove that burr on a buffer. I prefer a medium felt wheel with pink scratchless compound but white or green compound work fine as well as will other buffing wheels. Quick and easy way to put a bevel and final edge on a blade. Just clean off any compound that built up on the blade.

One thing to keep in mind with sharpening – the finer the edge, the more frequently you will need to maintain it… Strops loaded with compound (diamond, buffing compounds/rouge etc) are a quick way to touch up an edge that just lost it’s hair-popping sharpness.

Care and Maintenance of Carbon and Carbon Damascus Steels Part 2: Rust and Patinas

If you keep your carbon steel clean/dry/oiled or build up a nice patina on it, you won’t have any issues with rust.  But…  if you do get surface rust or minor pitting, it’s pretty simple to clean up and may leave a bit of character to the steel (the residual pitting and tarnish left after cleaning up the rust, not the rust).

Cleaning rust/pitting

Unless it’s a relic that was buried for a while, most rust is just minor surface corrosion.  For light surface rust a simple polish like Flitz may be enough to clean things up.  But if there is pitting, then fine steel wool (000 or 0000) along with some WD-40 is a better approach and quickly cleans down to base metal.  Steel wool will remove your patina too.  Naval Jelly is another option, but if you think that’s the best route, then sending it in for spa treatment is likely a better idea (contact me about spa treatment.)  Vinegar, lemon juice and other mild acids will also do the trick, but that’s not what I use so can’t recommend it.

Creating Patinas

Patinas are a surface layer that helps prevent rust – it’s a more rustic alternative than keeping a layer of oil, wax or polish on the steel.  One of the simplest methods to force a patina on carbon steel is application of cheap yellow mustard.  Clean the steel first with Dawn or equivalent and then apply a thin layer of mustard and let it sit for a while, 10-20 min is my starting point before rinsing/wiping clean, DRYING, and applying another coating.  I try to avoid putting mustard on the edge and after applying wipe the edge clean.  You can also mask areas with nail polish if you want to create patterns or simply apply mustard to limited areas and/or apply a range of thicknesses of mustard.  Forcing a patina like this (mustard) works both on carbon steel and carbon steel damascus.  Basically you repeat the cycle until you reach the desired patina, and then coat at least the edge with oil.  Note: I just rinse/wipe off the mustard with water (no soap) between applications, I only clean initially before starting the process.  Patinas will change over time with use, but this is the traditional way of prevention corrosion on carbon steel that has worked for 

If you decide to go the patina route over regular use of oil/wax/polish, then I’d encourage experimenting with it on a simple mono-steel (non-damascus) blade first to get the hang of it, getting a feel for how thick of a coating to use.  I don’t generally force patinas on damascus steel with mustard – usually they just develop over time with kitchen knives or knives used for eating/food prep.  It’s more common to force a patina on something that could use some corrosion resistance but wouldn’t patina during normal use (e.g. woodworking blades.) 

Here’s my personal leather knife as an example.  I left the logo side free of mustard as a reference and then applied expired French’s Yellow Mustard for 10 minutes at a time in thin coatings (thin enough I could still see most of the metal).  Here’s the results:

First the non-patina (control) side – this is what the other side started like as well – this blade had a buffed finish so not all that dark to start with..
First thin coating of mustard.
After the first 10 min mustard bath.
After the second mustard bath.
After the third mustard bath.
And after applying a thin coating of mineral oil – the color faded a bit but will come back as the oil layer thins.

And here’s similar treatment on a 1095 blade – 4 rounds and only oiled the edge:

Round 1
Round 2
Round 3
Round 4 – Done

Next up, which will “probably” next week – either sharpening or (re-)etching damascus.

Care and Maintenance of Carbon and Carbon Damascus Steels Part 1: Cleaning and Protective Coatings

This will be the first of a set of posts on maintaining carbon steel and pattern-welded carbon (Damascus) steel tools.  Other posts will include rust/patinas, sharpening, re-etching, leather care and whatever else I think of including over the next few weeks.

Blade Basics

First off, a couple quick knife and carbon steel basics:

– Don’t leave a carbon steel knife wet (or most stainless steels) – wipe them dry when not using them.  

– Don’t put a knife through the dishwasher…  If you need to clean it, clean it by hand and dry it immediately.

– Don’t cut on surfaces harder than the blade like ceramics or glass as this will very quickly dull an edge.

Otherwise, use a carbon steel or pattern-welded blade like any other knife.  I use mine regularly for cutting up cardboard boxes, cutting hay bale strings, for food preparation, as a dinner utensil and for making kindling (we heat our house with a wood stove that I start every morning around 5).

Cleaning

I don’t clean my knives often since there’s no good reason after most cutting tasks, really only after cutting something like raw chicken or if the knife got bloody.  Blue Dawn soap is my standard go-to, both for cleaning dirty knives as well as cleaning steel in preparation for etching.  Other solvents like acetone, isopropyl alcohol and tert-butyl acetate also work well.  Tert-butyl acetate is the best as it won’t leave any residual moisture…  but WD-40 after cleaning will also ensure no moisture stays on the surface, as will compressed air. 

Protective Coatings

After cleaning, which exposes the surface to the environment, it’s important to apply some sort of protective coating.  Even if you haven’t cleaned a knife it doesn’t hurt to apply a protective coating regularly, especially if you live in a humid environment.  There are a wide variety of coatings available, both food-grade (food safe) and ones not approved for use with food.  The products I use and recommend include oils, waxes and polishes.  Follow the manufacturer’s instructions for their application, using clean paper towels, toilet paper and microfiber cloths.

Oils

I believe oils are best for blades primarily used for food preparation, as well as pattern-welded blades where darker etched areas are desired.  Mineral oil is the standard and available both in food-grade and non-food-grade (usually for horses, available at farm stores).  Mineral oil is the main ingredient in a lot of knife/gun oils out there (e.g. Ballistol, Rem Oil.)  Camellia oil is another that I currently use and is common with Japanese carbon steel cutlery.  I haven’t switched completely to this from mineral oil, but I’m headed that way.  WD-40 works fine as well, but does tend to evaporate relatively quickly compared to the other oils.

Waxes


I like waxes for bushcraft knives as well as long term storage.  Renaissance Wax is my go-to for longer term storage, but good carnauba wax works well too.   Polishes
For me, polishes usually do a bit of cleaning as well as being a protective coating.  Flitz and Simichrome are my favorites.  The USDA-approved Flitz seems to be a bit more abrasive than the blue variety of Flitz or Simichrome, and typically it will reduce the contrast slightly on pattern-welded steel as the darker areas will lighten up a bit (although the bright layers shine up a bit, so it’s a trade-off).  I find polishes best for brighter blades like mirror polish or pattern-welded blades where there are more bright layers than dark, typically in higher layer count patterns).  Polishes may also remove a bit of patina, but are a great first step if a blade starts to discolor or rust.

Next week – rust and patinas.

Heat Treatment of 1095 and 1095/15N20 Damascus Steel Part 2

Now that the steel is annealed, this is the best time to grind, drill, file etc., while the steel is in a softer, machineable state. 


Anti-Scale

After grinding, drilling, etc., the steel is soaked for another 10-15 minutes at 500 F and anti-scale compound is applied again to prevent decarb during the long austening soak.  Often I’ll only coat the business end with anti-scale as I’m not as concerned with some decarb on the handle.


Austenizing and the Quench

After anti-scale is applied, the steel goes back in the HT oven and temp is ramped up to 1475 F.  The steel is soaked for 10 min once the HT oven hits temperature, and then is quickly quenched in warm (generally 65-110 F) Parks 50 oil, agitating the steel up and down.  Parks 50 is a fast quench oil meant to mimic water quenching with less stress and warpage.  In winter, when the oil is 20-30 F, I use an engine block heater to warm up the oil to recommended temperature, and occasionally in the summer I’ll use old blue ice packs to cool the oil if it’s too hot.  If you see lots of flames during the quench, then you’re breaking down your oil.  Quench oil isn’t cheap but will last a long time if used properly. 

Warpage

Straight out of the quench, the steel will frequently be warped.  I generally keep the steel in the oil for 7-10 seconds and when it comes out, it’s hot enough to be straightened by hand, or in a post vise (or post vise with aluminum quench plates).  Funny that sometimes I can see the warpage in the steel, and seconds later it will bend back to straight all on it’s own (or warp the other way if you correct it). 

The thinner the steel, the more it tends to warp. If a blade is still warped by the time it has cooled down to 200 F or so, then I generally re-quench rather than attempting to re-bend during tempering or cold working.  I’ve never had a blade crack or break during quench, but I have lost several trying to re-straighten during tempering.

Once the steel is cooled to 150-200 F, I put the steel in boiling water to remove the anti-scale compound, and then it goes straight into the toaster oven for snap tempering.

Snap Temper

This is an important part of the process that is sometimes overlooked.  HT ovens heat up much faster than they cool down… One way to avoid the need for snap tempering is to have a second HT oven dedicated to tempering to avoid waiting for cooldown.  I snap temper at approximately 325 F in a toaster oven while the HT oven cools.  This generally takes about an hour.  This is to avoid potential cracks that occur if a quenched blade is allowed to cool to room temperature.  Just because you don’t have cracks after quench doesn’t mean they won’t appear later if you leave the blade cool before tempering (this is a major flaw/issue in a popular tv show…)   Once the HT oven has cooled, the steel is removed from the toaster oven and cooled in water before heading back to the HT oven for proper tempering.

Tempering

Tempering is the part of the process where I have enough time to do other things away from the shop.   The HT oven is set for 375 F (kitchen and EDC blades) or 425 F (hard use blades, hoof picks, golf tools) and the steel is soaked for 2 hours time.  Then the steel is cooled off in water and the same tempering procedure is repeated.

Hardness Testing

Now the steel is ready for final grinding, hardness testing, hand sanding, etch, handles etc…  I haven’t been able to justify a proper Rockwell hardness tester, but there are alternative that can work well if you know how to use them properly.  Files and chisels of known hardness work well.  I have a set of chisels and these are what I’d strongly recommend over files.  The idea is to try to scratch the steel in question with the files – if the file/chisel is harder, the steel scratches, if the steel is harder, the file/chisel dulls.  Yes, it DULLS, that means once you use it and dull it, it needs to be sharpened again if you want a valid test.  Chisels are easy to keep sharp, removing minimal material, with a sharpening stone.  Files… not so much.  Before putting the final edge on the blade, I also test by shaving pieces of steel off a welding table I have nearby.

If all of the equipment is working properly but part or all of the steel surface isn’t hardening, decarb is likely the issue.  This can be verified by a quick etch in ferric chloride.

A good reality check in addition to hardness is breaking a sample piece of steel that was heat treated with everything else to analyze the grain size.  

Remember, all of this is specific to 1095 and 1095/15N20 Damascus steel.  Other steels generally will have different processes to optimize the final properties of the steel via heat treatment.

Heat Treatment of 1095 and 1095/15N20 Damascus Steel

Proper Thermal Processing or Heat Treatment (HT) is essential for making a high performance blade.  Geometry and steel selection are very important as well, but without correct HT toughness and the ability to hold an edge will be lacking.

Different steels require different HTs – the process outlined here is what I use for 1095 steel and for 15N20/1095 pattern-welded steel.  The process is similar for 1080/1084 or CruForgeV steels, although 1080/1084 doesn’t require the annealing step described here.

Forging steel, especially at high temperatures needed for forge-welding, disrupts the structure within the steel, especially the distribution of carbides.  This is especially true for 1095 steel, which has more carbon than it knows what to do with.  This leads to the need for annealing or spheroidizing the steel after heavy forging to ensure the structure of the steel is ready for hardening.  

These are the steps to my HT process:
– Apply anti-scale compound
– Normalize
– Grain reduction cycle #1
– Grain reduction cycle #2
– Anneal
– Rough grinding/filing/drilling
– Austenize
– Quench
– Snap Temper
– Temper #1
– Temper #2
and at the end of this process, the blade is ready for final grinding, hand sanding and etching.


Part 1 covers up through annealing, and Part 2 will cover the rest.

After forging something to shape, be it a blade, pry bar, golf tool etc., and letting it cool down, it goes back in the forge for a quick stab at normalizing.  For these steels, that means heating it up to roughly 1575 F and then air cooling.  In this step, air cooling is most often done by setting the glowing steel on a bed of coke on my coke forge, but sometimes by putting the end of the handle in a vise.  This step is done in still air – if it’s windy outside, the forge doors are closed so there isn’t a breeze cooling the hot steel too fast.  In general I run the forges with a reducing environment where there is minimal free oxygen, so scaling and decarburization (decarb) is minimal – with a typical heat treat oven, that is not the case.

Anti-scale Compound:  Avoiding Decarb

Once I’ve got enough things forged to justify turning on the HT oven (an Evenheat 22.5 LB w/ TAP controller) the first step is to warm up the tools to be heat treated to 500F (soaking at that temperature for at least 10 minutes) so that the anti-scale compound that I use will adhere to the steel.  Currently I’m using Brownell’s Non-Scaling Compound (https://www.brownells.com/gunsmith-tools-supplies/metal-prep-coloring/heat-treating-accessories/non-scaling-compound-sku083015100-1122-4011.aspx).  I’ve tried others, but I’ve found this to be the most effective and easiest to apply, and it will stay on for several cycles in the HT oven.  I keep this in an oversized salt shaker, stored in a zip lock back.  Once tools are done soaking at 500 F, I apply a generous coating of the compound before tools go back into the HT oven for higher temperature processing.

Without anti-scale compound, an inert gas environment, the reducing environment of a forge, or a vacuum, carbon will constantly be lost from the steel, resulting in decarb.  That is, you end up with a thin layer on the surface of iron (steel minus the carbon) which will not harden.  This is a very bad thing on the edge of a blade, but not necessarily a bad thing elsewhere…  If you’re not ‘etching’ the steel after decarb forms, then it’s unlikely you’ll see it.  Etching the steel in ferric chloride will quickly show you if decarb is present as it appears sort of hazy (on the left side of the image below, by the forge marksI call it ‘bling’ as it’s usually got a crystalline look to it)

Normalizing

Now that the steel is protected from oxygen, the next step is normalizing – this helps reset the grain structure and make it more uniform and also relieves some of the built-up stress in the steel.  With the HT oven still at around 500 F from the anti-scale application, the blades are put in the HT oven and the temp is ramped up to 1575 F and the steel is allowed to soak for approximately 10 min once the oven reaches that temperature.  Then the blades are removed and allowed to air cool, usually clamped in a vise.  I usually have two batches or more, so the first batch cools down while the next batch soaks in the oven.  Again, still air here – I keep the shop doors closed for this step if there’s any wind outside.

Grain Reduction


After normalizing, where we’ve made the grain size more uniform (more normal), the next steps are to further reduce the grain size.  This is basically the same process as normalizing, but done at a lower temperature.  Blades go in the HT oven, temp is ramped up to 1450 F and everything is soaked for approximately 10 minutes and then removed to air cool.  Cooling speed isn’t as critical here, so instead of clamping the handle in a vise, the blades are set on a small shelf of expanded metal to air cool.  Once cool, the same process is performed a second time.


Annealing/Spheroidizing


For a while, I used the temper anneal process, where blades were austenized, oil quenched, and then soaked at 1200F for 30 minutes.  But once I learned about Divorced Eutectoid Transformation (DET) annealing I did some testing and quickly switched to that process.  Annealing is a step that can be skipped with steel like 1080 – just normalizing is enough to make it easy to drill or saw and it’s not required to get it ready for austenizing/quenching.  However, with the extra carbon in 1095, annealing is required to break up the carbide structures that form during forging and extended time at high temperatures and to get the steel ready for austenizing/quenching.
Following normalizing and grain reduction, the DET annealing is done by putting the blades in the HT oven, ramping the temperature up to 1380 F, soaking for 30 minutes and then slowly ramping the temperature down to 1200 F at a rate of 670 F/hour.  Once the oven reaches 1200 F, the blades are removed and allowed to air cool.
Finally, I put the blades in a large skillet with some water and boil for a few minutes which remove the anti-scale compound.  


Next up will be Austenizing–>Quenching, Tempering, testing hardness and checking grain size in Part 2.


In the mean time, check out one of the best books out there an heat treating steels specific to knifemaking:

https://www.amazon.com/Knife-Engineering-Steel-Treating-Geometry/dp/B08D4P9D95